Setup Mailserver using Mailcow
Setup Keycloak in Mailcow
- To add or edit your Identity Provider configuration, log in to your mailcow UI as administrator, go to System > Configuration > Access > Identity Provider and select Keycloak from the Identity Provider dropdown.
- Create a
mailcowclient in keycloak - Update the fields based on your configurations.
- An important thing to take care of is in the
Server Urlfield, your url must be the keycloak URL followed by /auth likehttps://keycloack.test.com/auth - You can enable
Auto-create users on loginwhich will autocreate your mailbox in the mailcow when you login to your mailserver using keycloak, provided the user is already present and enabled in keycloak.

Notes -
- If we disable user in keycloak then user won't be able to login to mailcow but will continue getting mails
- Make mailbox as inactive - if we don't want a user to get mails
- Once mailbox is deactivated in mailcow - user can't even login to mailcow
Setup a Shared mailbox in Mailcow
- Create a shared mailbox in mailcow and login to that.
- Add delegation for a user - then only you can share the folder and update perms
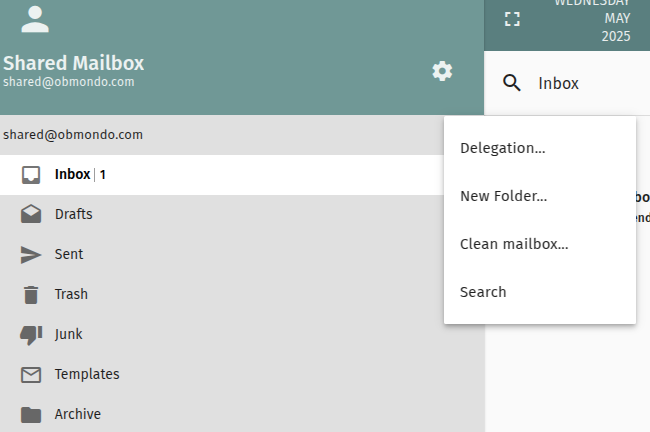
- Once the delegation is added you can start to share it that users.
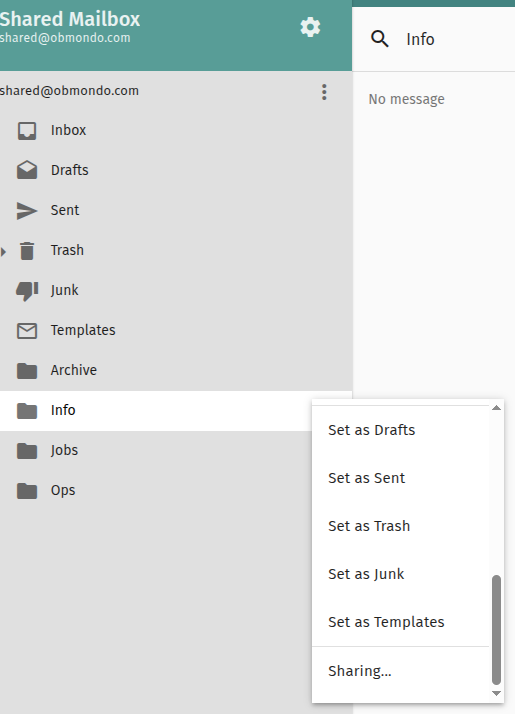
Shared mailbox with multiple folders
- You can create multile folders like
info,ops,jobsetc in your shared mailbox and then share them across your team.

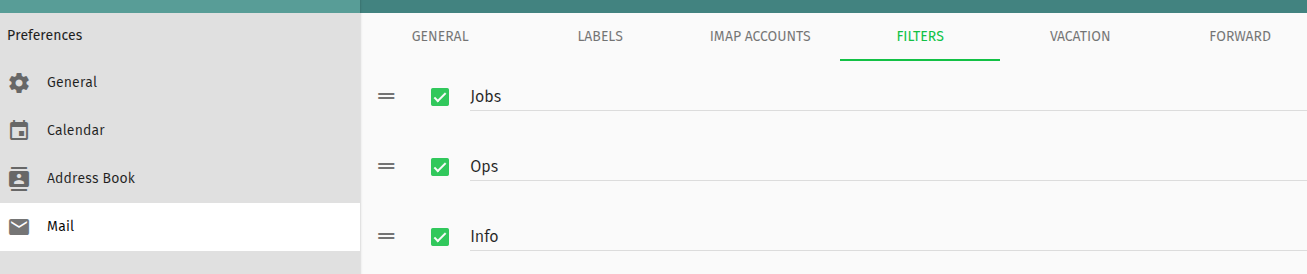
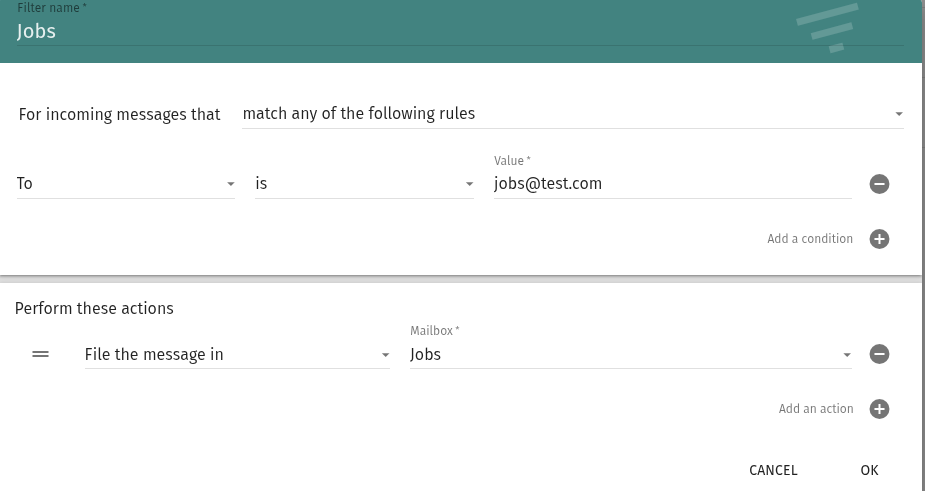
- You can then write a filter rule so that if mail sent to your
jobs@test.comit lands to yourjobsfolder. Click onPreferences ->Mail -> Filter
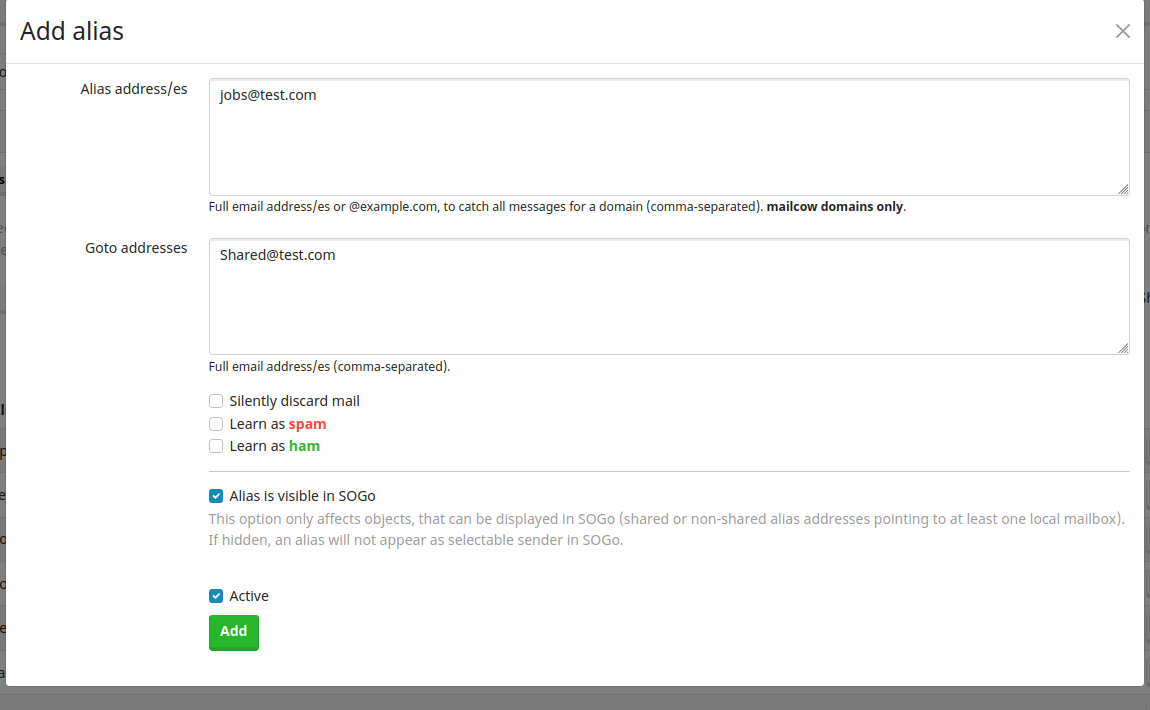
- You need to create a alias in mailcow so that any mails that gets sent to
jobs@test.comgoes to your shared mailbox likeshared@test.com. This you can do by logging as admin in mailcow and thenEmail -> Configuration -> Aliases -> Add Alias
Sync Mails from Kolab to Mailcow
- Log in to Mailcow using keycloak
- Open https://mail.obmondo.com/user
- Select
Sync Jobs
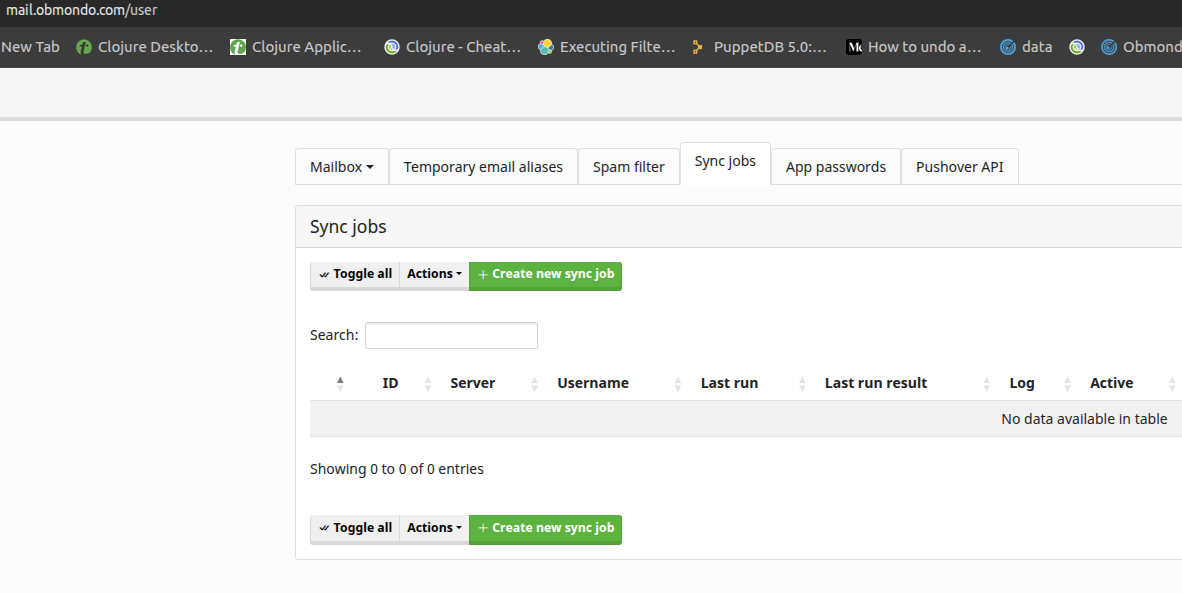
- Click on
Create new sync job - Create a new sync job:
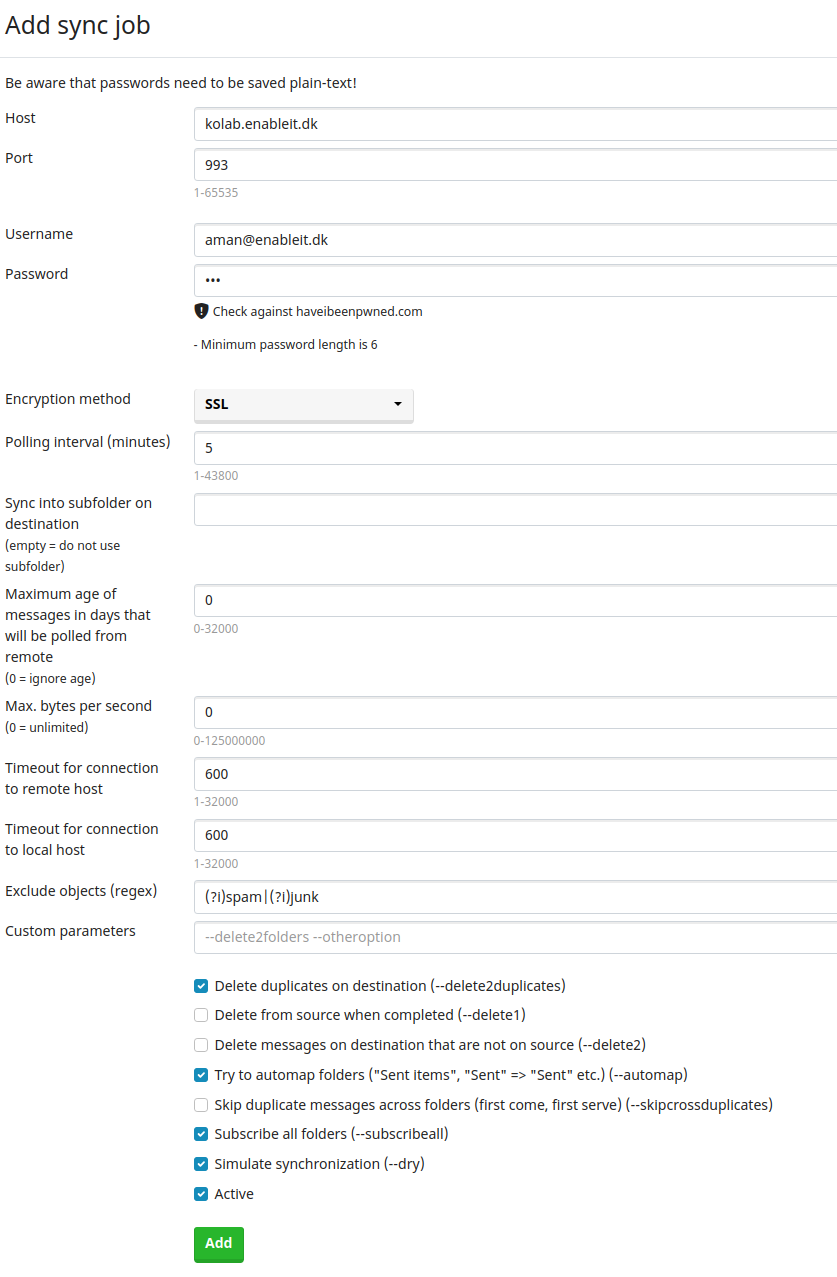
- Set the host to
kolab.enableit.dk. - Use port
993. - Enter the username and password for
kolab.enableit.dk. - Set the polling interval to 5 minutes (this determines how often the job reruns).
- Scroll down and click Add to create the sync job.
- Set the host to
- Wait for some time for the synchronization to start.
- Click on Open Logs to check the logs while syncing emails.
- Once the job is completed, the Last Run Result will show Success.
Backup and Restore
Backup
Mailcow role already creates a service mailcow-backup.service and timer which takes the complete backup of mailcow daily at 2:15 AM.
By default the backup location is /opt/mailcow unless role::mail::mailcow::backup_dir is defined as some other location.
Backup directory will look something like
mailcow-2025-05-23-08-25-02 mailcow-2025-05-23-08-32-30 mailcow-2025-05-23-08-33-48 mailcow-2025-05-23-08-41-40 mailcow-2025-05-23-08-46-25
above is in format of date and time during which backup was started
You can even run a manual backup if necessary
MAILCOW_BACKUP_LOCATION=/opt/backup CREATE_BACKUP_LOCATION=yes /opt/obmondo/docker-compose/mailcow/helper-scripts/backup_and_restore.sh backup all
Restore
Run the backup_and_restore.sh script which is present in the mailcow/helper-scripts/ folder.
mailcow is whee you have intialized/clone the mailcow directory.
Sample run
# MAILCOW_BACKUP_LOCATION=/opt/backup /opt/obmondo/docker-compose/mailcow/helper-scripts/backup_and_restore.sh restore

Using 1 Thread(s) for this run.
Notice: You can set the Thread count with the THREADS Variable before you run this script.
Using /opt/backup as backup/restore location.

Found project name mailcow
[ 1 ] - /opt/backup/mailcow-2025-05-23-08-25-02/
[ 2 ] - /opt/backup/mailcow-2025-05-23-08-32-30/
[ 3 ] - /opt/backup/mailcow-2025-05-23-08-33-48/
[ 4 ] - /opt/backup/mailcow-2025-05-23-08-41-40/
[ 5 ] - /opt/backup/mailcow-2025-05-23-08-46-25/

Select a restore point: 5

[ 0 ] - all
[ 1 ] - Mail directory (/var/vmail)
[ 2 ] - SQL DB
[ 3 ] - Rspamd data
[ 4 ] - Redis DB
[ 5 ] - Postfix data
[ 6 ] - Crypt data

Select a dataset to restore: 0